By Ophelia Jackson, NOFA/Mass Intern
To the uninitiated, a SCOBY can certainly look a little strange—unappetizing, alien, grotesque even, belonging more in a Hogwarts classroom than their own home kitchen. Despite its appearance, though, the process of brewing kombucha is actually quite simple and forgiving, and the materials required are relatively easy to acquire.
What You Need
1. SCOBY Starter and Liquid
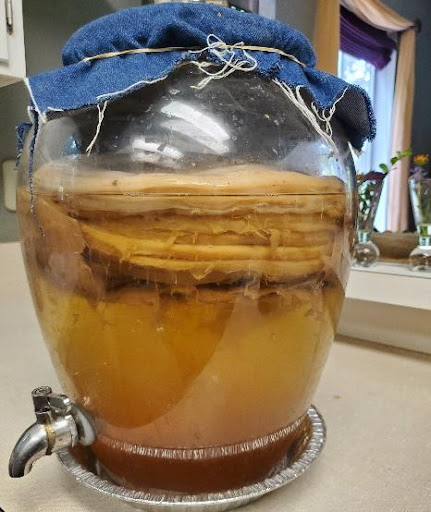
Kombucha fermenting on the counter. Photo credit: Ophelia Jackson
The SCOBY is the organism responsible for the fermentation process; there is no kombucha without it. If you are fortunate to know another homebrewer, a new SCOBY can be obtained simply by gently separating a top layer—called a pellicle—from their mature culture. (Don’t feel shy about asking for this “favor”. If it might be going too far to call kombucha brewers a proselytizing folk, they are nonetheless often quite enthusiastic about the practice, and more than happy to share it with newcomers.) Local kombucha breweries are another potential source of SCOBY’s. If neither sources are available in your area, however, it is also possible to order a SCOBY starter from an online supplier. I obtained mine from Fermentaholics several years ago, with good results. Regardless of the source, it is best to start with a full-size SCOBY that measures at least 5 inches wide or weighs 4-5 ounces. It should include at least a cup of starter liquid (raw, mature kombucha) and should not have been refrigerated or dehydrated for transportation.
2. Vessel with Breathable Cloth Cover
In selecting a vessel, you are choosing the headquarters for your brewing operation and the home for your SCOBY for “generations” to come. The decision is nonetheless a forgiving one, however, and glass, porcelain, ceramic, food-grade plastic or stainless steel vessels can all work well. The vessel should hold between 1-5 gallons. Because SCOBY’s should not be exposed to direct sunlight, an opaque container may be necessary if it will be placed in a well-lit area. For brewing, I prefer a glass container to observe the SCOBY’s growth, and recommend one with a spout to more easily remove liquid from the vessel when it is mature.
3. Sugar
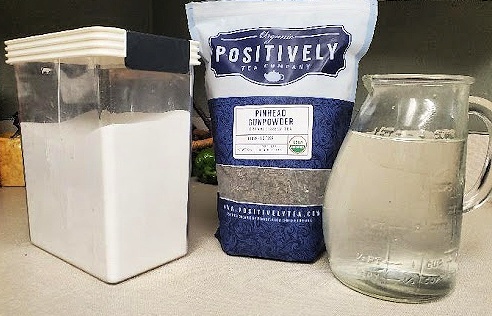
Sugar, tea and water. Photo credit: Ophelia Jackson.
The sugar in sweetened tea supplies the SCOBY’S energy source; less refined sugars or pasteurized honey can be used, but conventional, granulated white cane sugar is sufficient. If buying the bag makes you cringe, just think of it as “SCOBY chow.”
4. Water
The SCOBY is an “aquatic” organism, and brewing a gallon of kombucha requires a gallon of water. Because most municipal tap water contains chlorine, it should be filtered or boiled for at least fifteen minutes before use, since the antibacterial can damage the SCOBY (which is a symbiotic culture of bacteria and yeast.)
5. Tea
Tea provides the foundation for kombucha’s flavor. Black, oolong, green, and white teas are the most popular; loose leaf tea is often higher quality than tea bags and produces less waste, but bagged teas can also be used. It is best to avoid herbal teas, which do not contain the nutrients to brew multiple batches of kombucha, and are often treated with chemical preservatives or flavorings harmful to the SCOBY.
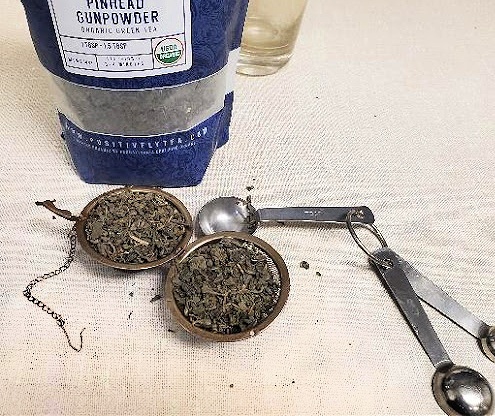
Gunpowder green loose leaf tea. Photo credit: Ophelia Jackson.
Brewing Steps
- Steep 1-2 tablespoons of loose-leaf tea, or 4-6 tea bags, in four cups of cool water. Although most tea instructions call for steeping for 5-15 minutes, I prefer a very strong tea for kombucha brewing and usually leave them in the water for up to an hour.
- Remove tea bags or leaves after the tea has reached the desired strength. Transfer tea to a small saucepan or pot, add a cup of sugar, and bring to a boil. Allow to boil for several minutes until sugar is fully dissolved, stirring as necessary. Set aside to cool.
- Note: Another option is to reverse the first and second steps, dissolving sugar in the water first and steeping the tea afterward. Leaves or bags cannot be composted after steeping in sugar water, but if you do not intend to do this, steeping them at the same time the water is cooling can save time.
- When the sweet tea is cool, add it to the vessel with the SCOBY with three additional quarts of cool, filtered water and 1-2 cups of starter liquid. (Adding the starter liquid last acidifies the pH of the tea near the top of the vessel, offering a layer of protection from potential pathogens. Cover the vessel with a breathable cloth and secure it with a rubber band.
- Store the vessel in a warm (ideally 75-85 degrees Fahrenheit), dark place, out of direct sunlight, and leave to ferment for 7-21 days.
- Note: Don’t worry if the starter culture sinks to the bottom, or even seems to dissolve and disappear in the vessel. These things sometimes happen during the first few fermentation cycles, but the new layer, or “daughter,” will still form over the sweet tea. It may be very thin and transparent at first, but lightly touching the surface will reveal the new layer forming there; the SCOBY goes from clear to pearly as it matures.
- After 3-5 days, I recommend beginning to taste the kombucha. (I begin each day with a sip from each of my vessels, to keep tabs on flavor and commune with the brew.) However, it is also valuable to observe the SCOBY with all your senses; you will see a new layer of growth appear, smell the characteristic, slightly vinegary tang develop, and may even hear the brew begin to fizz slightly when poured. Other signs of fermentation include a small ring of bubbles forming between the top layer of SCOBY and the surface, and the liquid lightening in color as the culture breaks down the tannins in the tea. The ambient temperature is also important to consider, since a warmer environment accelerates the fermentation process.
- Kombucha’s flavor transitions from sweet to sour as it matures. When it has reached your desired balance, it is ready to harvest. (I will discuss harvesting, flavoring, bottle-aging, and other next steps in the next article.)
Lessons Learned
Over the years, I’ve both refined my brewing method and grown more attuned to the fermentation process that follows. Like students of many endeavors, I believe that learning to brew kombucha has taught me more than just a recipe, procedure, or series of indicators to watch for. It has also required me to develop something more profound—a patience, faith, grace—a humble confidence coming not from a certainty in one’s own abilities, but rather, a recognition of the limitations of our own perception. Although kombucha brewing, done properly, is an experience engaging all the senses, the initial stages of the fermentation process often cannot be seen, felt, or touched; they progress gradually and imperceptibly at first, mysterious, occurring without us. It’s often unclear whether the SCOBY is doing what it should—or doing anything at all. Through this inherent uncertainty, brewing—and especially learning to brew—kombucha requires that we acknowledge the processes of growth and change occurring constantly in the world all around us, even when they do not produce concretely observable evidence. For me, working with the SOCBY serves as a constant reminder that everywhere we hope to arrive is more rendezvous than destination. We can only do our own half with the patient faith that something else—the SCOBY, the circumstances, the universe—is also unfolding as it should to meet us there.
Sources
The Big Book of Kombucha: Brewing, Flavoring, and Enjoying the Health Benefits of Fermented Tea, Hannah Crum and Alex LaGory
Read part 1 of this series here.
Read part 3 of this series here.


